
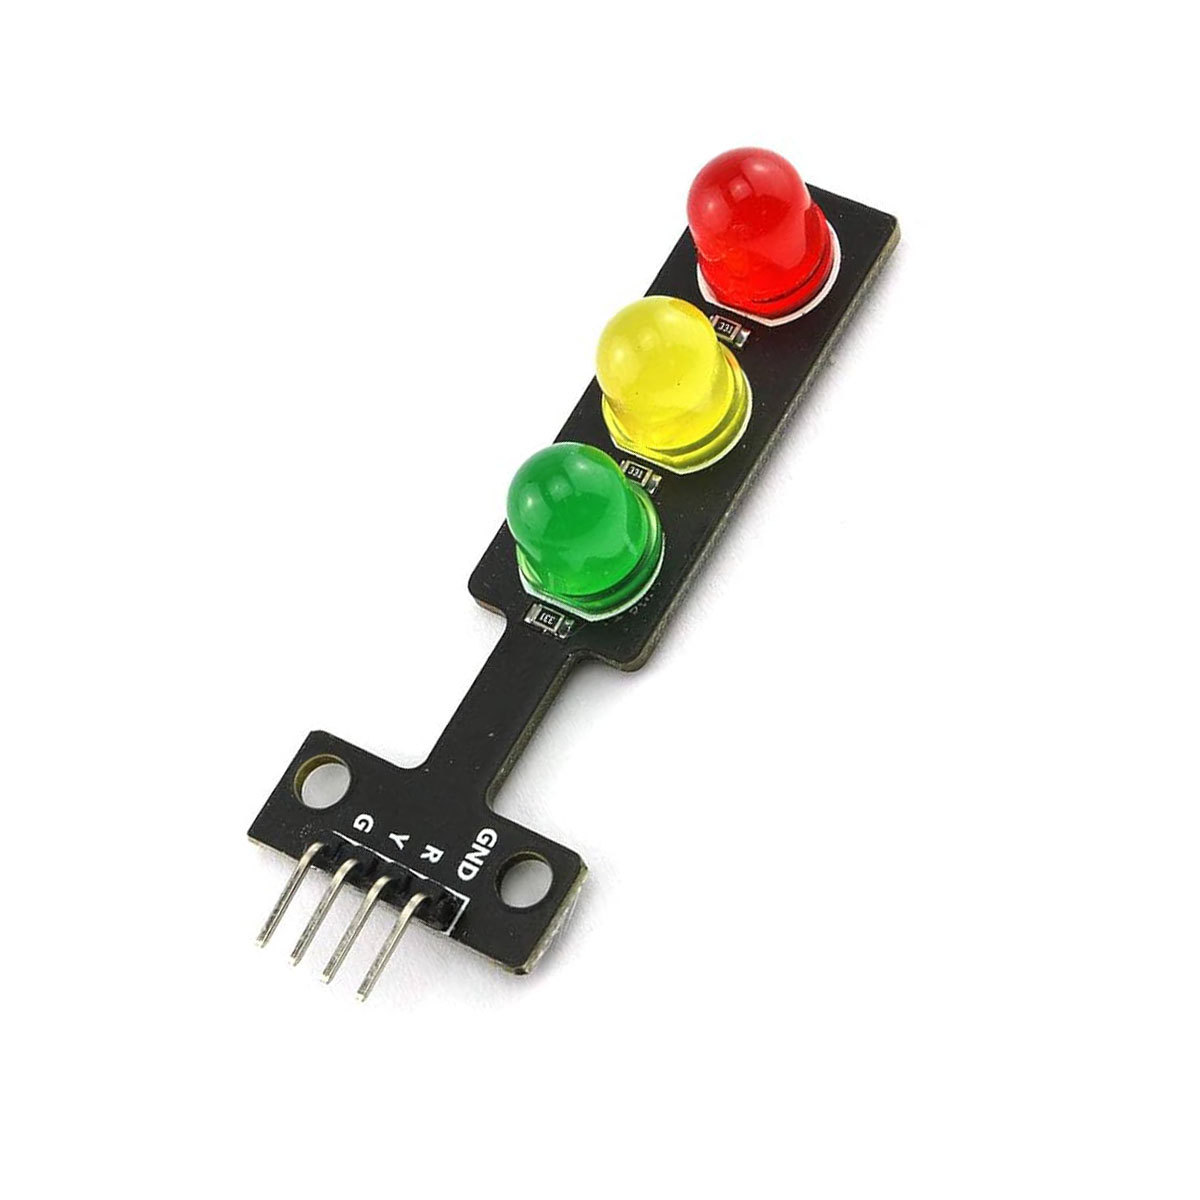
Mini 5V Traffic Light LED Display Modu...
$ 0.50
The Mini 5V Traffic Light LED Display Module is a perfect educational and prototyping tool for simulating real-world traffic control systems. At Electrapac, we recommend this compact module for students and hobbyists in Bangladesh who are learning to code with Arduino, ESP32, or Raspberry Pi, as it provides a clear, visual way to master timing logic and GPIO control.Product OverviewThis module features three high-brightness 8mm LEDs in the classic Red, Yellow, and Green traffic configuration. Unlike wiring individual LEDs with messy resistors, this module integrates everything onto a single, slim PCB. It is designed with a Common Cathode configuration, meaning you only need one ground pin and three signal pins to control the entire unit.Key Features for Electrapac CustomersBreadboard Friendly: The slim design and standard 2.54mm pin header allow it to plug directly into a breadboard or connect via female-to-male jumper wires.Integrated Resistors: No need to calculate or add external resistors. The board is pre-configured to handle 3.3V or 5V logic safely without burning out the LEDs.Dual Voltage Compatibility: Works perfectly with 5V boards like the Arduino Uno and 3.3V boards like the ESP8266, ESP32, and Raspberry Pi.Clear Identification: Each pin is clearly labeled on the PCB (GND, R, Y, G), making wiring errors nearly impossible for beginners.High Contrast: Uses 8mm LEDs which are larger and brighter than standard 5mm LEDs, making them visible even in well-lit classrooms or workshops.Wiring & Arduino GuideSetting up the Electrapac Traffic Light module is incredibly simple. Connect it as follows:GND Pin: Connect to the Ground (GND) pin of your microcontroller.R Pin: Connect to a Digital Pin (D13) to control the Red light.Y Pin: Connect to a Digital Pin (D12) to control the Yellow light.G Pin: Connect to a Digital Pin (D11) to control the Green light.Pro-Tip: When programming your "Traffic Cycle," remember to use the delay() function to mimic real-world timing. Start with Green for 5 seconds, Yellow for 2 seconds, and Red for 5 seconds to create a realistic sequence.Primary ApplicationsSTEM Education: Teaching children and students the basics of digital logic and programming loops.Smart City Prototypes: Simulating automated traffic flow for university engineering projects.Status Indicators: Using the three colors to represent different states of a machine (e.g., Green = Running, Yellow = Standby, Red = Error).Interactive Toys: Building custom play-sets or model train signals.Visual Alerts: Connecting to a Wi-Fi module to show the status of a website or a server.Why Shop at Electrapac?We source our Traffic Light Modules with high-quality PCB substrates and uniform-brightness LEDs to ensure your educational projects look as professional as possible. Visit us at www.electrapac.com for the interactive modules that make learning electronics fun and easy.
You may also like…
-
 NEO-M8N GPS Module with Ceramic Active...Select options
This product has multiple variants. The options may be chosen on the product page
NEO-M8N GPS Module with Ceramic Active...Select options
This product has multiple variants. The options may be chosen on the product page
-
 ADXL345 3-Axis Digital Accelerometer M...Add to cart
-
 XH-M452 Thermostat Digital Temperature...Add to cart
-
 Magnetic Base 1575.42 MHz Car Vehicle...Select options
This product has multiple variants. The options may be chosen on the product page
Magnetic Base 1575.42 MHz Car Vehicle...Select options
This product has multiple variants. The options may be chosen on the product page
Related products
-
 BMS 3S 20A Li-ion Lithium Battery 3x18...BMS 3S 20A Li-ion Lithium Battery 3x18...
This product has multiple variants. The options may be chosen on the product page
BMS 3S 20A Li-ion Lithium Battery 3x18...BMS 3S 20A Li-ion Lithium Battery 3x18...
This product has multiple variants. The options may be chosen on the product page
-
 ESP-01 ESP8266 serial WIFI module wire...Add to cart
-
 GPS Module NEO-7M Satellite Positionin...Select options
This product has multiple variants. The options may be chosen on the product page
GPS Module NEO-7M Satellite Positionin...Select options
This product has multiple variants. The options may be chosen on the product page
-
 GY-8511 / ML8511 UV Light Sensor Modul...Select options
This product has multiple variants. The options may be chosen on the product page
GY-8511 / ML8511 UV Light Sensor Modul...Select options
This product has multiple variants. The options may be chosen on the product page